Making a Data Supplier Plugin: Part 3
Creating Text Data Providers and Polishing the User Experience
March 28, 2020 | 19 minute read
Designers deserve good user experience too! In the final post of this series, I'll show some simple user experience improvements for your Data Supplier plugin. I'll also explain how to write generalized code that makes it easy to expand and improve your plugin. 💪
TL;DR
I made a Sketch plugin. It provides fun chemical data to Sketch when you ask it to. Here's the GitHub and here's a case study that gives a good overview of the project.
In Review
This is final post of a three part series on Sketch Data Provider plugins. Here's what we've done so far:
- Part 1: Getting Started with SKPM — In the first post, I detailed the purpose and scope of this project, and explained how to get a basic Data Supplier Sketch plugin setup.
- Part 2: Creating a Sketch Image Data Provider for SVGs — Next, I described how to build an Image Data Supplier that pulls an SVG image from an API, and converts it to a PNG that can be supplied to Sketch.
In this post, I'll describe how to cleanly package several data suppliers in one plugin, and how to create a strong Data Provider Plugin User Experience.
Cleaning Up Our Code
We ended part two of this series with a fairly long Javascript file configured for a single data provider. Our goal in this post is to add three more data providers for other chemical data. In preparation for this, we need to clean up our code a bit to make it more generalized and re-usable.
Creating a Data Supplier Class
The most obvious part of our code that will be re-used between data suppliers is the data supplier code itself: the logic for iterating over the selected Sketch items, and providing data to each of them. We can make this code reusable with a JS Class. We'll create a new Supplier.js file in our src/ directory and fill out the basics:
import sketch from 'sketch';
import util from 'util';

class Supplier {
  constructor() {

  }
}

export default Supplier;
Next up, we need to figure out what information needs to be provided to the Class's constructor. This purpose of this class is to generalize the logic of looping over Sketch items and supplying data to them, so we will need:
- The
contextobject from the Sketch action function that creates this class, so that we can get the items to loop over. - The list of ChEMBL IDs that we use to pick random chemicals.
We'll also need to pick the DataSupplier utility out from the Sketch API.
import sketch from 'sketch';
import util from 'util';

const { DataSupplier } = sketch;

class Supplier {
  constructor(context, ids) {
    this.dataKey = context.data.key;
    this.items = util.toArray(context.data.items).map(sketch.fromNative);
    this.ids = ids;
  }
}
Next, we'll create a static method that handles supplying data using the DataSupplier.
const { DataSupplier } = sketch;

class Supplier {
  static supplyData(dataKey, data, index) {
    DataSupplier.supplyDataAtIndex(dataKey, data, index);
  }

  constructor(context, ids) {
    this.dataKey = context.data.key;
    this.items = util.toArray(context.data.items).map(sketch.fromNative);
    this.ids = ids;
  }
}
Now we need a method to handle iterating over the Sketch items and retrieving data for each of them. Since this is a generalized Class, we need to allow the code that generates the data to be provided as a method argument. We'll call this the worker. Since the data supply worker may make asynchronous calls to generate data (such as hitting an API), we will expect the worker to return a Promise. Here's what that looks like:
class Supplier {
  static supplyData(dataKey, data, index) {
    DataSupplier.supplyDataAtIndex(dataKey, data, index);
  }

  constructor(context, ids) {
    this.dataKey = context.data.key;
    this.items = util.toArray(context.data.items).map(sketch.fromNative);
    this.ids = ids;

    // Bind the new supply method's `this` keyword to the class instance
    this.supply = this.supply.bind(this);
  }

  // The supply method takes a worker function as a single argument.
  supply(worker) {
    // We loop over all the items defined by the `context` argument
    this.items.forEach((item, index) => {
      // And we get a random molecule ID from our list of ChEMBL IDs.
      const randomID = this.ids[Math.floor(Math.random() * this.ids.length)];

      // Then we pass the molecule ID as the single argument to the worker,
      // and expect the worker to resolve successfully with data.
      worker(randomID).then((data) => {
        // We use the supplyData static method to supply the data
        Supplier.supplyData(this.dataKey, data, index);
      });
    });
  }
}
Great! Let's reconfigure our original data supplier function in our main chemfill.js file to use this new class:
// Don't forget to import the Supplier class
import Supplier from './Supplier';

export function onSupplyRandomStructure(context) {
  const supplier = new Supplier(context, ids);

  supplier.supply((chemblID) => {
    const structureURL = `https://www.ebi.ac.uk/chembl/api/data/image/${chemblID}?format=svg`;

    // Remember that the `Supplier` class expects the worker to return a promise.
    return new Promise((resolve, reject) => {
      fetch(structureURL)
      .then((res) => {
        if(res.status === 200) {
          return(res.text()._value);
        }
      }).then((svgString) => {
        // Our original SVG -> PNG conversion logic stays here, but the PNG file path is
        // called with the Promise resolve callback, instead of returned
        resolve(pngPath);
      })
    });
  });
}
Great! That slimmed down our code quite a bit, and will make filling out our other Data Supplier methods much easier.
Creating an API Fetcher Class
In our code above, we still need to define our API fetching logic inside the worker we pass to our Supplier class. Let's abstract that out as well so we don't have to repeat it in our other Data Supplier methods.
We'll create a new APIFetcher.js file, and export a function to handle our fetching logic:
export default function APIFetcher() {}This function will need to be passed two arguments. The first is the URL to fetch data from. The second is the content type we wish to extract from the response. The Fetch API defines five methods for extracting body data from HTTP responses:
arrayBuffer()blob()json()text()formData()
So we can fill out the rest of our function like so:
export default function APIFetcher(url, contentType) {
  // Request data from the provided URL
  return fetch(url)
  // Once the response has been resolved
  .then((res) => {
    // Check the status of the response. If it was successfull
    if(res.status === 200) {
      // Return the value of the desired content type
      // ('arrayBuffer', 'blob', 'json', 'text' or 'formData')
      return res[contentType]()._value;
    }
    // If the response failed, throw an error message
    throw `Status code ${res.status} returned 😔`;
  })
  .catch((error) => {
    // Catch the thrown error message and throw it up another level
    // so the Data Supplier method can handle it as it sees fit.
    throw error;
  });
}
With our API Fetcher logic made re-usable, we can clean up our data supplier code even more.
// Don't forget to import the APIFetcher
import APIFetcher from './APIFetcher';
import Supplier from './Supplier';

export function onSupplyRandomStructure(context) {
  const supplier = new Supplier(context, ids);

  supplier.supply((chemblID) => {
    const structureURL = `https://www.ebi.ac.uk/chembl/api/data/image/${chemblID}?format=svg`;

    return new Promise((resolve, reject) => {
      APIFetcher(structureURL, 'text')
      .then((svgString) => {
        // Our original SVG -> PNG conversion logic stays here, but the PNG file path is
        // called with the Promise resolve callback, instead of returned
        resolve(pngPath);
      });
    });
  });
}
Nice! Now, in just a few lines, we can define a Data Supplier that fetches data from a URL and returns it asynchronously.
Failure Mode
Now that we have our code nice and generalized, we should take a second to think about what we should do when things don't go as planned. For example, what if our API request fails? A nice way to handle these errors would be to provide a backup default piece of data so that no matter what, the user gets data supplied. To do this, we'll start back in the Supplier class, and configure it to expect data to be provided from the worker's returned Promise, even if it fails.
class Supplier {
  static supplyData(dataKey, data, index) {
    DataSupplier.supplyDataAtIndex(dataKey, data, index);
  }

  constructor(context, ids) {
    // This stays the same
  }

  supply(worker) {
    this.items.forEach((item, index) => {
      const randomID = this.ids[Math.floor(Math.random() * this.ids.length)];

      worker(randomID).then((data) => {
        Supplier.supplyData(this.dataKey, data, index);
      })
      // If the worker encounters an error, we expect it to throw an error consisting
      // of an object that contains default backup data and an error message.
      .catch(({data, error}) => {
        // We pass the default data to the DataSupplier
        Supplier.supplyData(this.dataKey, data, index);

        // And we log the error to the console.
        console.error(error);
      });
    });
  }
}
Now we just need to update our Data Supplier function to throw an object with backup data and an error message if an API request fails.
export function onSupplyRandomStructure(context) {
  const supplier = new Supplier(context, ids);

  supplier.supply((chemblID) => {
    const structureURL = `https://www.ebi.ac.uk/chembl/api/data/image/${chemblID}?format=svg`;

    return new Promise((resolve, reject) => {
      APIFetcher(structureURL, 'text')
      .then((svgString) => {
        // Our original SVG -> PNG conversion logic stays here, but the PNG file path is
        // called with the Promise resolve callback, instead of returned
        resolve(pngPath);
      })
      // If the APIFetcher throws an error, we catch it here, and reject the promise with the
      // error object expected by the Supplier class.
      .catch((err) => {
          reject({
            // We grab a default molecular structure from our Resources folder
            data: path.resolve(path.join(RESOURCE_PATH, 'default-structure.png')),
            // We pre-pend the thrown error message to an explanation that a default molecular
            // structure is being returned instead.
            error: `${err} Returning a default structure instead.`
          });
        });
    });
  });
}
Putting It All Together
Let's take a look at what we have so far. Our file structure looks like this:
chemfill/
├── assets/
|   ├── chembl-ids.json
|   └── default-structure.png
└── src/
    ├── manifest.json
    ├── APIFetcher.js
    ├── Supplier.js
    └── chemfill.js
And we have the following JS code:
// APIFetcher.js
export default function APIFetcher(url, contentType) {
  return fetch(url)
    .then((res) => {
      if(res.status === 200) {
        return res[contentType]()._value;
      }
      throw `Status code ${res.status} returned 😔`;
    })
    .catch((error) => {
      throw error;
    });
}
// Supplier.js
import sketch from 'sketch';
import util from 'util';
const { DataSupplier } = sketch;
class Supplier {
static supplyData(dataKey, data, index) {
DataSupplier.supplyDataAtIndex(dataKey, data, index);
}
constructor(context, ids) {
this.dataKey = context.data.key;
this.items = util.toArray(context.data.items).map(sketch.fromNative);
this.ids = ids;
this.supply = this.supply.bind(this);
}
supply(worker) {
this.items.forEach((item, index) => {
const randomID = this.ids[Math.floor(Math.random() * this.ids.length)];
worker(randomID).then((data) => {
Supplier.supplyData(this.dataKey, data, index);
})
.catch(({ data, error }) => {
Supplier.supplyData(this.dataKey, data, index);
console.error(error);
});
});
}
}
export default Supplier;import sketch from 'sketch';
import fs from '@skpm/fs';
import path from 'path';
import sketchDom from 'sketch/dom';
import os from 'os';
import APIFetcher from './APIFetcher';
import Supplier from './Supplier';
const { DataSupplier } = sketch;
const document = sketchDom.getSelectedDocument();
const RESOURCE_PATH = '../Resources/';
const TMP_DIR = path.join(os.tmpdir(), 'com.sketchapp.chemfill-plugin');
const idsFileRaw = fs.readFileSync(path.resolve(path.join(RESOURCE_PATH, 'chembl-ids.json')));
const { ids } = JSON.parse(idsFileRaw);
export function onStartup() {
DataSupplier.registerDataSupplier('public.image', 'Molecular Structure', 'SupplyRandomStructure');
DataSupplier.registerDataSupplier('public.text', 'SMILES String', 'SupplyRandomSMILES');
DataSupplier.registerDataSupplier('public.text', 'Molecular Formula', 'SupplyRandomFormula');
DataSupplier.registerDataSupplier('public.text', 'Molecular Weight', 'SupplyRandomWeight');
}
export function onShutdown() {
DataSupplier.deregisterDataSuppliers();
try {
if (fs.existsSync(TMP_DIR)) {
fs.rmdirSync(TMP_DIR);
}
} catch (err) {
console.error(err);
}
}
export function onSupplyRandomStructure(context) {
const supplier = new Supplier(context, ids);
supplier.supply((chemblID) => {
const structureURL = `https://www.ebi.ac.uk/chembl/api/data/image/${chemblID}?format=svg`;
return new Promise((resolve, reject) => {
APIFetcher(structureURL, 'text')
.then((svgString) => {
const svgNSString = NSString.stringWithString(svgString);
const svgData = svgNSString.dataUsingEncoding(NSUTF8StringEncoding);
const svgImporter = MSSVGImporter.svgImporter();
svgImporter.prepareToImportFromData(svgData);
const svgLayer = svgImporter.importAsLayer();
const guid = NSProcessInfo.processInfo().globallyUniqueString();
svgLayer.setName(guid);
document.pages[0].layers.push(svgLayer)
try {
sketch.export(svgLayer, {
formats: 'png',
scales: "3",
output: TMP_DIR
});
svgLayer.removeFromParent();
const pngPath = path.join(TMP_DIR,`${svgLayer.name()}@3x.png`);
resolve(pngPath);
} catch (err) {
throw err;
}
})
.catch((err) => {
reject({
data: path.resolve(path.join(RESOURCE_PATH, 'default-structure.png')),
error: `${err} Returning a default structure instead.`
});
});
});
});
}
// Stub out these three functions — we'll come back to them later.
export function onSupplyRandomSMILES (context) {
return;
}
export function onSupplyRandomFormula (context) {
return;
}
export function onSupplyRandomWeight (context) {
return;
}Alright! We've got our code nice and generalized, and we added some pretty solid error handling. We're ready to build out our other data handlers.
Providing Data from a JSON Response
The good news is that we've taken care of the most complicated bits of our project. Now that we have nice generalized classes at our disposal, building out our text data providers will be a piece of cake.
The Data Source
Let's revisit what the goal of our remaining data providers are. Back in the first post in this series, we identified that we wanted to provide the following chemical data:
- Structures: Images of molecules showing the atoms and bonds that make up a structure.
- Formulas: The molecular formulas that detail the type and count of atoms in a molecule.
- Weights: These numbers represent the molecular weight of a molecule.
- SMILES Strings: These strings of text represent the physical structure of a molecule.
We've taken care of Molecular Structures. All that's left is Formulas, Weights and SMILES Strings. Luckily, ChEMBL has an answer for those too! There's a convenient API route that returns the chemical data for any ChEMBL ID. We can even get it in a convenient JSON format!
> curl https://ebi.ac.uk/chembl/api/data/molecule/CHEMBL405398?format=json

  {
    "molecule_properties": {
        "full_molformula": "C156H238N42O45",
        "full_mwt": "3421.87"
    },
    "molecule_structures": {
        "canonical_smiles": "CC[C@H](C)[C@H](NC(=O)[C@H](CCC(=O)O)NC(=O)[C@H](CCCCN)NC(=O)[C@H]..."
    }
  }
Building Out The Rest
With our source identified, building out our remaining Data Suppliers is fairly simple. We'll start with our random chemical formula provider.
export function onSupplyRandomFormula (context) {
  // First we need to create a new supplier instance using the context passed to this data supplier action.
  const supplier = new Supplier(context, ids);

  supplier.supply((chemblID) => {
    // We set up the ChEMBL URL for fetching chemical data
    const structureURL = `https://www.ebi.ac.uk/chembl/api/data/molecule/${chemblID}?format=json`;
    return new Promise((res, rej) => {
      // And we fetch the JSON response using our APIFetcher
      APIFetcher(structureURL, 'json').then((jsonBlob) => {
        // Finally we resolve the promise by picking out the molecular formula data from the API Response
        res(jsonBlob.molecule_properties.full_molformula);
      })
      .catch((err) => {
        // If anything goes wrong, we catch the error and pass it along, along with a default chemical formula.
        rej({data: 'C36H59N7O7', error: `${err} Returning a default structure instead.` });
      });
    });
  });
}
We can follow this pattern exactly for our SMILES string and molecular weight providers.
export function onSupplyRandomSMILES (context) {
  const supplier = new Supplier(context, ids);

  supplier.supply((chemblID) => {
    const structureURL = `https://www.ebi.ac.uk/chembl/api/data/molecule/${chemblID}?format=json`;
    return new Promise((res, rej) => {
      APIFetcher(structureURL, 'json').then((jsonBlob) => {
        res(jsonBlob.molecule_structures.canonical_smiles);
      })
      .catch((err) => {
        rej({
          data: 'CC[C@H](C)[C@H]1NC(=O)[C@H](CCCN=C(N)N)NC(=O)[C@H]2CCCN2C(=O)[C@H](CC(N)=O)NC(=O)[C@@H](CC(=O)O)NC(=O)[C@H](NC(=O)[C@H](CC(C)C)NC(=O)[C@H](C)NCc2cccc3ccccc23)CSSC[C@H](C(=O)N[C@@H](CCC(N)=O)C(=O)N[C@@H](Cc2ccccc2)C(=O)N[C@H](C(=O)N[C@@H](CCC(=O)O)C(=O)NCC(N)=O)C(C)C)NC(=O)[C@@H](Cc2ccc(O)cc2)NC(=O)[C@H](Cc2c[nH]c3ccccc23)NC(=O)[C@@H](CCCN=C(N)N)NC(=O)[C@H](CC(=O)O)NC1=O',
          error: `${err} Returning a default structure instead.`
        });
      });
    });
  });
}

export function onSupplyRandomWeight (context) {
  const supplier = new Supplier(context, ids);

  supplier.supply((chemblID) => {
    const structureURL = `https://www.ebi.ac.uk/chembl/api/data/molecule/${chemblID}?format=json`;
    return new Promise((res, rej) => {
      APIFetcher(structureURL, 'json').then((jsonBlob) => {
        res(jsonBlob.molecule_properties.full_mwt);
      })
      .catch((err) => {
        rej({data: '768.90', error: `${err} Returning a default structure instead.` });
      });
    });
  });
}
The Results
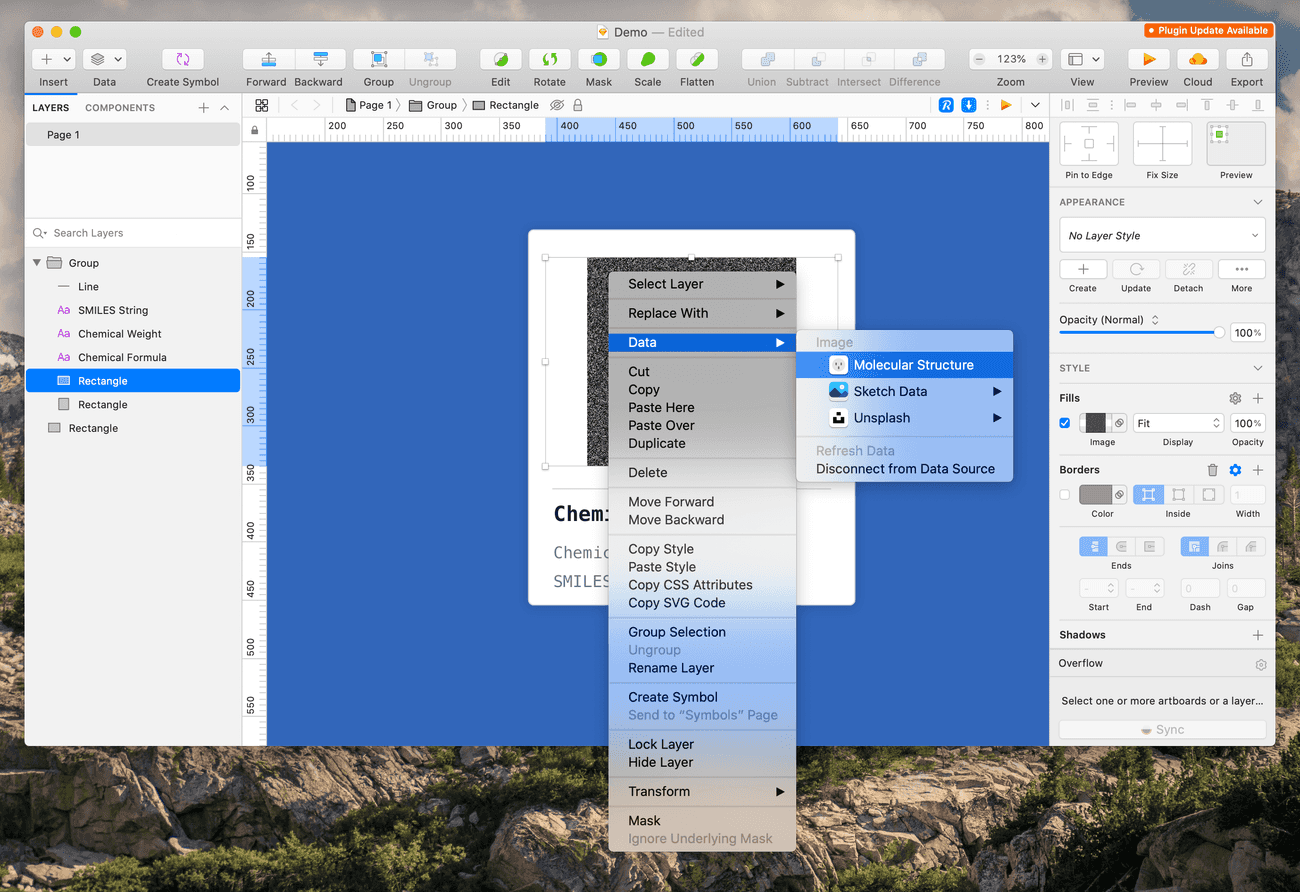
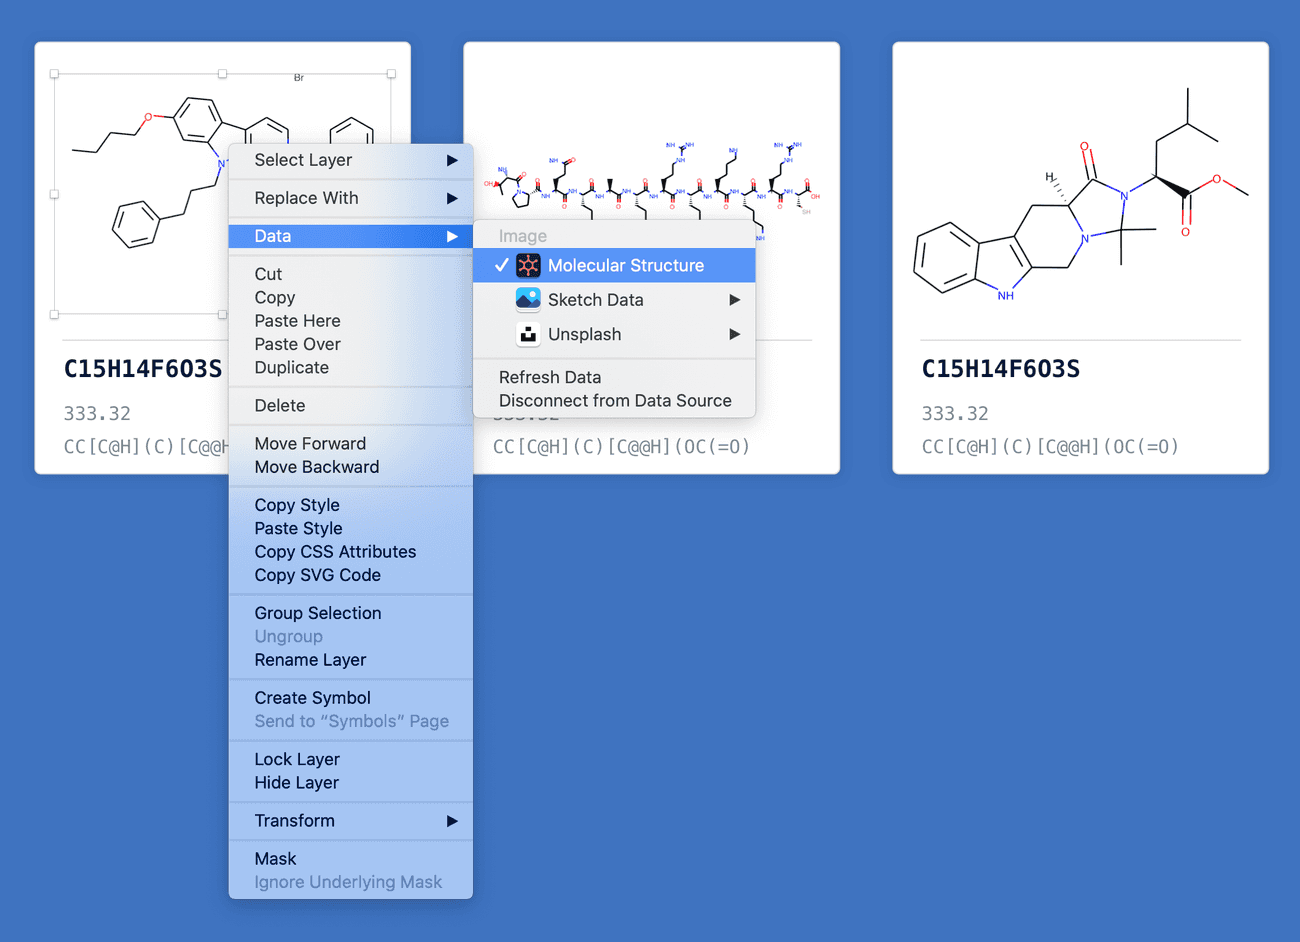
Let's try out our work and see how it looks! We'll start by confirming that our image provider still works.
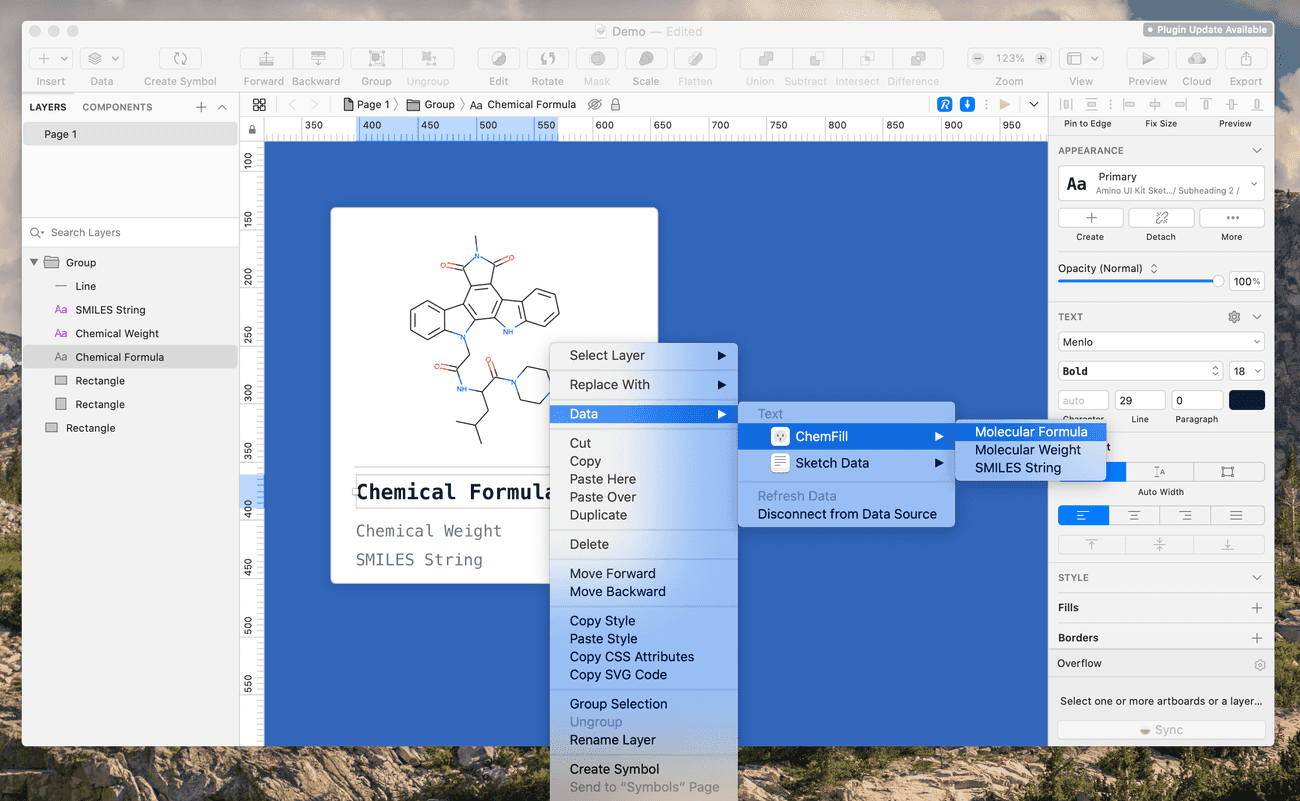
Sure does! Now let's fill in some text data.
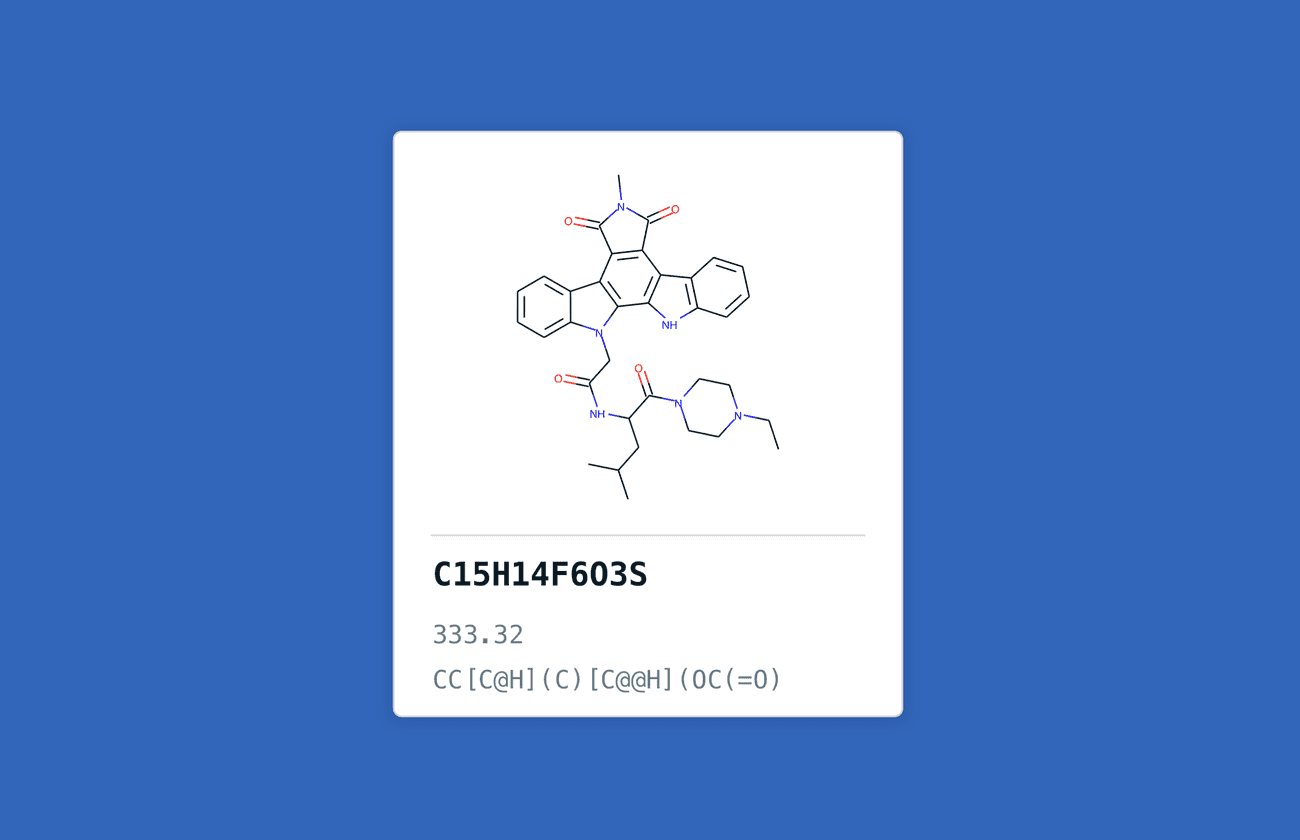
Works like a charm! We can see here how quickly this tool let's us fill in chemical data that would have been very tedious to insert manually.
Crafting a Strong User Experience
With our plugin working well, it's time to turn to the user experience of using it. The most useful improvement we can make would be providing useful status messages to the user. Since the plugin has to make an API call to fetch the data, it can take some time for the data to appear. It would be nice to inform the user of what's going on. Beyond this, adding some branding would be helpful in identifying our plugin in the plugins list.
Providing Useful Status Updates
There are three situations where updating the user on the status of the plugin would be helpful:
- Confirming that the request was received immediately after the user requests data.
- Confirming that the request was successfully completed.
- Communicating error messages to the user when they arise.
Luckily, Sketch provides a very simply library for showing messages to the user. We'll start by showing a simple message when the user first activates the plugin. In our chemfill.js file, we'll import the Sketch UI library and add a small helper function that we'll include at the start of our data provider functions.
import UI from 'sketch/ui';

function showWaitingMessage() {
  UI.message("Fetching your chemical data!");
}

export function onSupplyRandomFormula (context) {
  showWaitingMessage();

  const supplier = new Supplier(context, ids);

  supplier.supply((chemblID) => {
    const structureURL = `https://www.ebi.ac.uk/chembl/api/data/molecule/${chemblID}?format=json`;
    return new Promise((res, rej) => {
      APIFetcher(structureURL, 'json').then((jsonBlob) => {
        res(jsonBlob.molecule_properties.full_molformula);
      })
      .catch((err) => {
        rej({data: 'C36H59N7O7', error: `${err} Returning a default structure instead.` });
      });
    });
  });
}
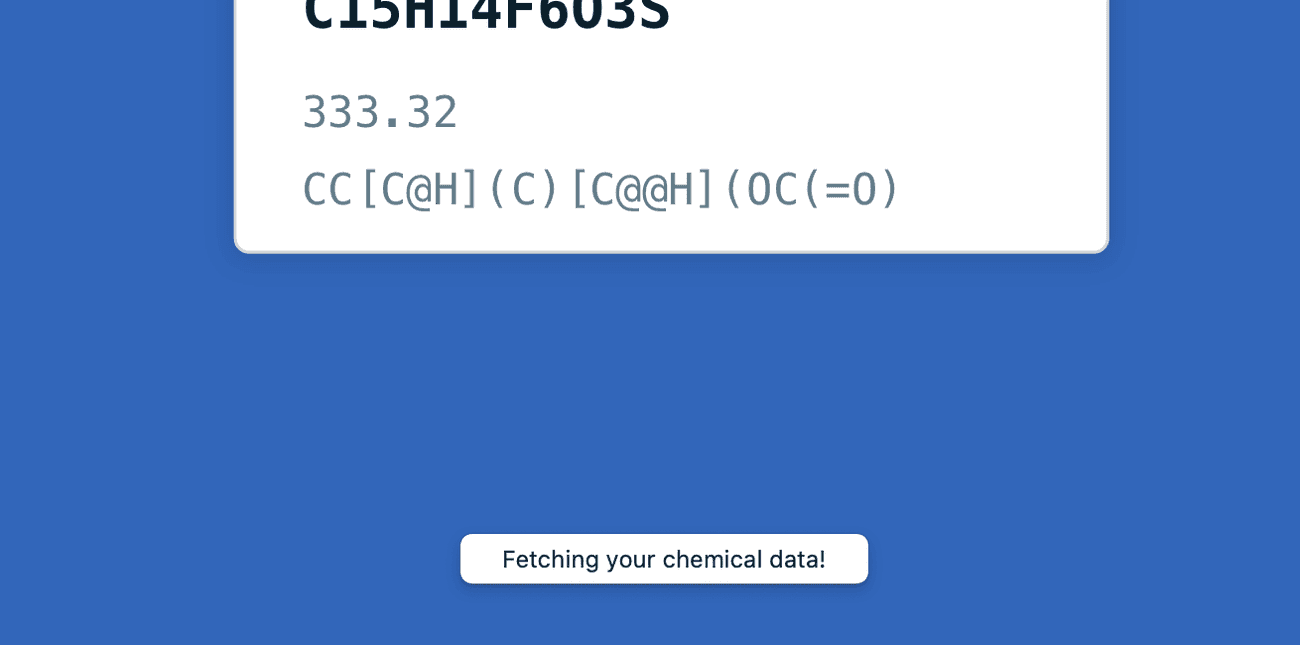
Now, when we call our plugin, we see a helpful status update down at the bottom of the sketch window.
Next up is communicating that all data requests have completed. This is a little more tricky since a user can select multiple objects and request data for them all simultaneously. We don't want to show a message when every request completes — that could get overwhelming. Instead, we need to track all of the requests that are in flight, and show a message only when they've all completed. Luckily, we can implement this right in our Supplier class with a simple counter.
class Supplier {
  static supplyData(dataKey, data, index) {
    DataSupplier.supplyDataAtIndex(dataKey, data, index);
  }

  constructor(context, ids) {
    this.dataKey = context.data.key;
    this.items = util.toArray(context.data.items).map(sketch.fromNative);
    this.ids = ids;
    this.supply = this.supply.bind(this);

    // We need a counter of how many supply requests haven't yet completed. We
    // anticipate having one request per item.
    this.supplierTracker = this.items.length;

    // We also need a count of how many supply requests there were in total (1 per item).
    this.supplierStackCount = this.items.length;

    // We'll allocate a place to store an error message should one arise.
    this.errorMessage;

    // We need a success message to send once all the requests are done.
    this.successMessage = `Synthesized ${this.supplierStackCount} ${
      this.supplierStackCount === 1 ?'compound' : 'compounds'
    } for you!`;
  }

  supply(worker) {
    this.items.forEach((item, index) => {
      const randomID = this.ids[Math.floor(Math.random() * this.ids.length)];

      worker(randomID).then((data) => {
        Supplier.supplyData(this.dataKey, data, index);

        // Decrement the number of active trackers once the data is handed off
        // to the Data Supplier
        this.supplierTracker--;

        // If the supplierTracker has been decremented to 0, then all the
        // requests have completed and we should show the user an error message
        // if one was returned, or otherwise show a success message.
        if (this.supplierTracker === 0) {
          UI.message(this.errorMessage || this.successMessage);
        }
      })
      .catch(({ data, error }) => {
        Supplier.supplyData(this.dataKey, data, index);
        // We need to decrement even if the worker failed
        this.supplierTracker--;

        // If an error did occur, set the errorMessage variable.
        this.errorMessage = error;

        // Print every error to the console
        console.error(error);

        // It's possible that an error occurs on the final worker, so we need to
        // in which case we need to trigger the status message here as well.
        if (this.supplierTracker === 0) {
          UI.message(this.errorMessage);
        }
      });
    });
  }
}
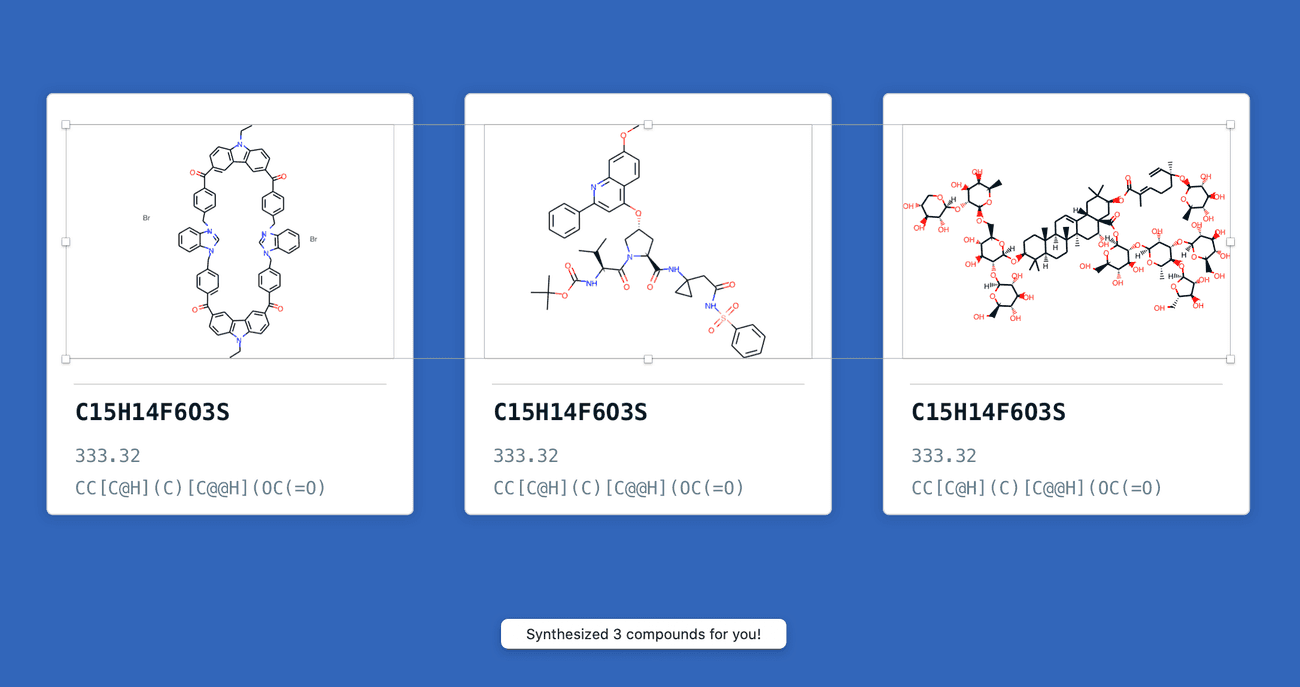
Let's see it in action! Here we're selecting three shapes and requesting a molecular structure for all of them.
Adding Some Flair
We've added status updates to our user experience. As a final step, we just need some branding. This part is trivial. When we first created our plugin template back in Part 1, a default icon.png image was created inside the /assets directory. Let's just replace that with something that shows off the ChemFill brand.
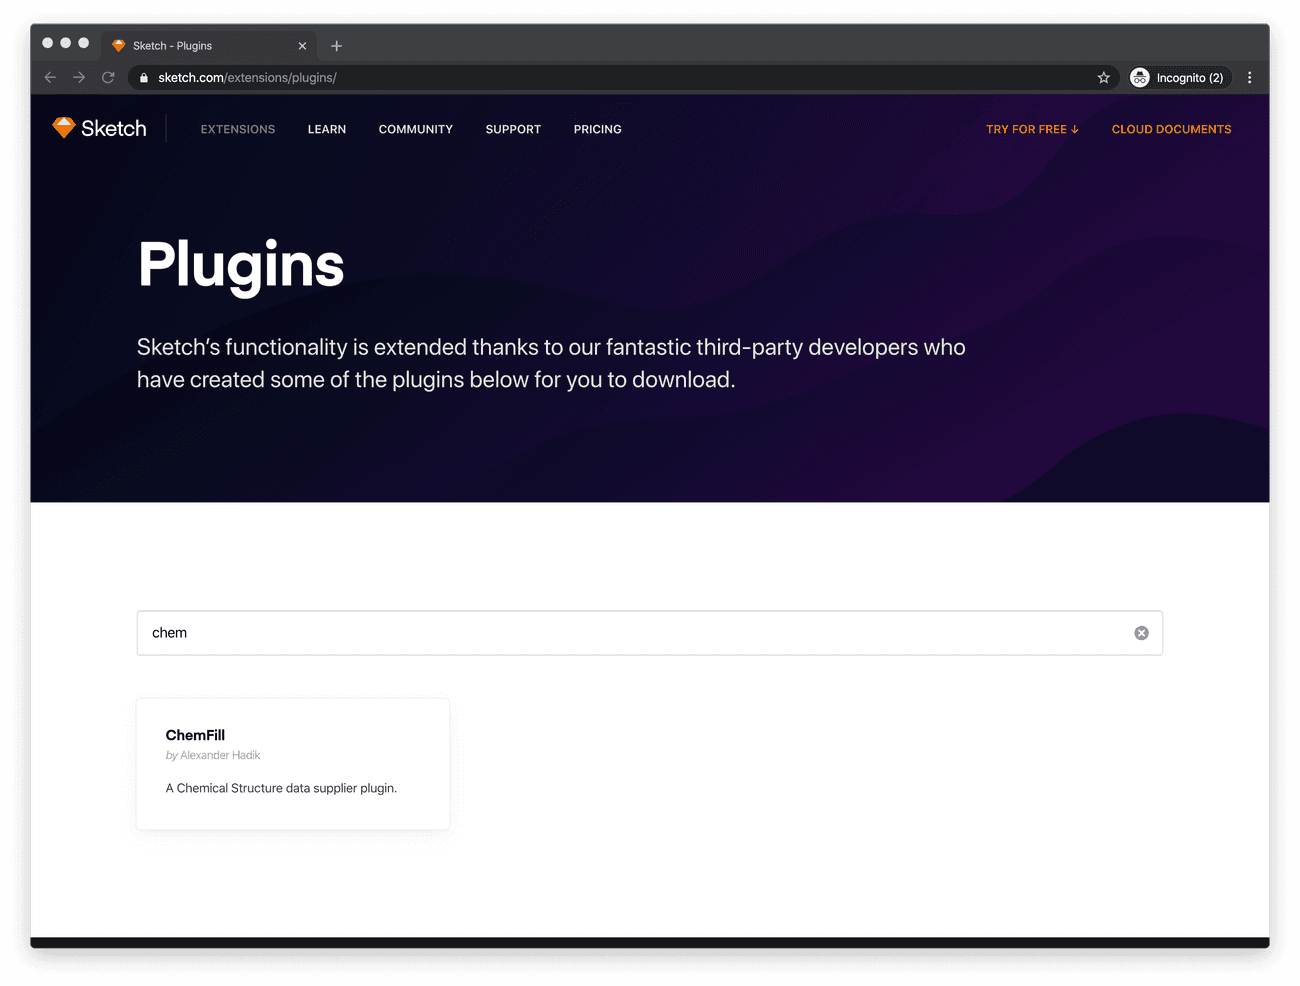
Now when we go to use the ChemFill plugin, it really stands out!
And Finally, Let's Publish!
We've got ourselves a great little plugin here! The last step in this journey is to publish it. Before we go any further, make sure that you've committed your work in Git and pushed it to GitHub. Sketch Plugin managers pull code from GitHub, so you'll need it hosted there to share your work with the Sketch Developer community.
Next up, let's do one final build of our plugin to make sure everything is transpiled for production: yarn build.
Then, we can use SKPM to publish our work. Plugins are included in Sketch's Plugin Directory by updating a JSON file in the Sketch Plugin Directory repository. SKPM is smart and will open a PR with your plugin added if you haven't published your plugin before. For full documentation on the SKPM Publish command, check out the SKPM README.
One you've published your plugin with SKPM, and it's been merged into the Sketch Plugin Directory, you'll be able to find it on all of the Sketch plugin managers, and the Sketch website itself!
In Review
Wow, thanks for making it this far with me! Over the past three posts, we've discussed:
- How to setup a basic Data Supplier plugin with SKPM
- How to pull JSON and image data from an API in the SKPM environment
- How to convert an SVG to a PNG in order to supply it to a Data Supplier
- How to provide strong status messages to the user so they know what's going on under the hood.
- How to add some basic branding to your plugin.
If you'd like to take a look as the source code for this project, checkout the ChemFill plugin on GitHub. If you liked this material, give the repository a star on GitHub!
That's all for now folks. See you next time! 👋

